January 23, 2017

One month with Cinema 4D

I recently took a month off work to learn 3D. I wanted a little break from webdesign, and with the girlfriend out of town this was a unique chance for me to dive in to the world of 3D — something that I have been wanting to do for a while now. In this post I’ll go over how I approached learning Cinema 4D, and share some of the aha moments I had along the way.

Striped balloons. A fade between the work window in Cinema 4D, and the final render.

Where do you even begin?

There are a few different 3D programs to choose from, the main ones being 3ds Max, Maya and Cinema 4D. One of my friends told me that Cinema 4D was getting a lot of traction at the moment, and that the community around it was stronger than the others. Coming from a web development background, I know the importance of community around software, so I decided to try out Cinema 4D for that reason.

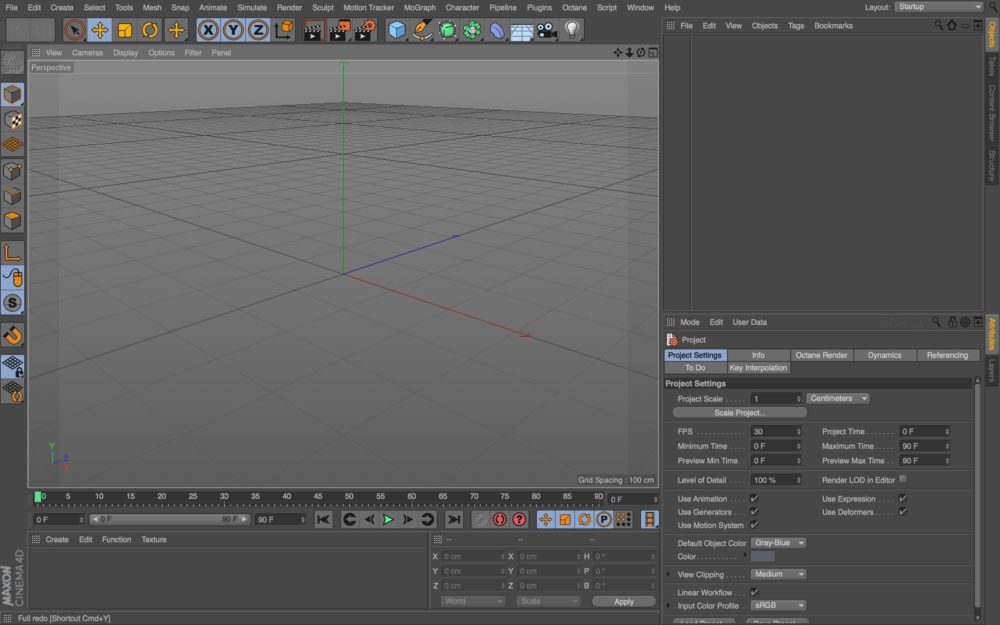
Opening Cinema 4D for the first time can be quite intimidating though. The interface is fairly complex and the learning curve quite steep. It’s definitely not one of those applications you open up and just play around with until you get something pretty.

The opening screen of Cinema 4D.

I found that learning some of the basic 3D concepts and gaining an understanding of what a typical workflow looks like, sped up the learning process a lot. Fortunately we live in the age of the internet with plenty of online resources. I initially started learning Cinema 4D from the essential courses on Lynda.com. While these videos provide a really good walk-through of all the windows and buttons, I found that it was a little too slow and didn’t really help me understand what a 3D workflow looks like. It’s not really possible to remember how all the different tools inside Cinema work without putting them to practical use first. So to me these types of courses are better used as a reference when working with something specific. What worked better for me was to binge-watch the tutorials on Grayscale Gorilla. Their tutorials are mostly project-based, which means that you will go through all the different steps involved in a simple 3D project — from modelling and setting up the scene, to lighting and rendering. And in the end you will end up with a good looking render of your own while having learned a few new tricks along the way.

This was my very first Cinema 4D project. The abstract animation is a result of following this Grayscale Gorilla tutorial. Creating this gave me a better understanding of primitive objects, materials & some basic keyframe animation.

After doing a few tutorial-based projects, you start to get familiar with different toolsets inside Cinema 4D. And as you get more comfortable with the basic concepts, you can (and should) begin to get more creative and experimental. Try and do things slightly different from the tutorials. Even if it’s just a different shape or different colours. This will strengthen your design skills and inspire you to create other things on your own. I found that I was able to make completely original artwork after just a few of these project-based tutorials. Sometimes I would start out by following a tutorial, but then an idea would send me in a completely different direction. Don’t be afraid to experiment, but remember to press “save” regularly!

I found that in my first month of working with 3D, I began to look at the world through a 3D lens. If I saw something cool in real life, I’d try and think how I could make that in Cinema. If I saw an interesting shadow on a building, I’d wonder how I would set up my lighting rig to recreate it. Getting into the habit of this kind of thinking even effects how I work with 2d design and web design now, which is why I think 3D can benefit any type of designer.

Working with your existing skill set.

A cool thing about 3D is that any kind of design experience you might have has the potential to become an asset in your 3D workflow. Experience with photoshop is useful when post-processing the final render. Almost all renders coming out of Cinema can be improved upon with colour-correction, curves and contrast. Experience with Illustrator is useful when playing around with vector paths in Cinema. You can save any 2d vector shape in illustrator, move it into cinema and turn it into 3d by extruding or sweeping the shapes. If you are a photographer, your experience with cameras and lighting will translate well into setting up the scenes. If you are an animator, you will understand the timeline and key-framing system well, not to mention that Cinema 4D has great integrations with After Effects. My point is that while the world of 3D can seem really complex to a beginner, there are probably are aspects that you will find easy, depending on your existing skill set.

Here, I played around with transparency and reflections in Cinema 4D in order to create the background. Then I added the circle and did some post-processing in photoshop.

Cheap tricks and fancy new terms.

One of the biggest struggles I had when I started out was getting my renders to look somewhat decent. No-one  likes the fake 3D Software look, but if you just create a few shapes and hit render you will get exactly that. This is one of the reasons why the learning curve can feel so steep. In order to get decent results you have to understand the world of render engines. Cinema 4D comes with a few render engines out of the box, and these are more then great when you’re starting out. The ‘standard’ and ‘physical’ render engine can give you beautiful results if you know how to set it up.

Two terms you want to get familiar with early on are ‘Global Illumination’ and ‘Ambient Occlusion’. These effects are not enabled by default (they tend to increase render times a lot) but in a lot of cases they makes the difference between a realistic looking render and a fake 3D looking one. Global Illumination (GI) simulates how light bounces between your objects — much like how light works in real life. Ambient Occlusion (AO) simulates shadows generated by objects within close proximity of each other. Both of these effects help create depth and authenticity to your scene. It is important to note that these two effects greatly impacts render times, as the scene has a lot more to calculate. This is why it typically shouldn’t be added until everything else is looking the way you want. I have used the plugin HDRI Studio rig from Grayscale Gorilla a lot, which lets you import some nice basic GI and AO settings without needing to understand the technical aspects. It is not a free plugin, but I recommend buying it if you can afford it as it lets you focus more on learning the earlier steps in the workflow, and worry less about advanced render-settings. But you can also just add the effects via your render-settings on your own.

This render uses both global illumination and ambient occlusion in order to get a more believable look. Notice the natural gradients on the surface and the shadows in the creases of the objects.

Computers are slow!

That’s right! If anything is gonna test your computers limitations, it’s 3D software. I work on a late 2013 Macbook Pro and normally it does everything I want without any issues. But working in 3D you will find that you are very much limited by what your computer can handle. As soon as you start to play with a lot of objects, simulate dynamics or render complex scenes, your computer will start to choke. Working with and around the limitation of your setup is a skill of its own. Having dived into the online 3D community, it seems clear that render time is part of the creative design-process, and not just a technical problem. But having a better machine does open up possibilities.

Most of the images that I included in this post took more than an hour to render, and these are all fairly simple scenes. I have to render animations overnight as it can easily take 3-4 hours for 3-5 seconds of animation on my machine. Note: I could probably have used more efficient settings and gotten faster and prettier results, but hey, I’m still very much a beginner.

Some of my experiments would simply crash my computer before I even got to the render-step, or make the viewport so slow that it became impossible to get anything done. You’ll quickly get into the habit of hitting “save” on a regular basis. Trust me!

Having said that, there are definitely plenty of cool things you can do on a smaller setup, though I don’t think its practical to work on anything less than the specs of a late 2013 MacBook Pro. I am actually considering getting a super-powered PC now, since Apple doesn’t seem that interested in their power-users anymore. Plus, you get more bang for your buck in the PC-world.

The 3D community and “Dailies”.

Getting into the 3D design community was a very cool experience for me. The amount of talent out there is as inspiring as it is intimidating. Everyone seems to be on a mission to learn more and share their knowledge. This goes for tutorials, courses and talks, to podcasts, posts and comment threads. Occasionally you’ll even find people live-streaming their process on Twitch while interacting with viewers, which I very much hope to see more of in the future. I can’t recommend enough seeking out all the different channels.

If you’re not already on Instagram, you should definitely sign up — if only to follow some of the amazing 3D artists out there. You’ll quickly notice a trend among 3D designers referred to as “dailies” or “everydays”. The concept is simple: post a unique render every day for a year. The idea is to make it a habit to learn and produce something new every single day. The reason why it is important to post it online is to keep you honest and critical of your work. The concept was pioneered by an artist called beeple, who might just be the most prolific 3D artist out there. He has been doing “everydays” for more than 10 years now, and is still going. I highly recommend watching his talk on the subject too.

Here are some of my favorite accounts to follow on Instagram:

Now go follow all of them!

Final thoughts

After just one month of working with Cinema 4D, I am obviously still very much a beginner, But I understand just enough to keep me going in my free time. Going back to web design, I feel that I have a new tool in my belt too. I can create 3D illustrations that are designed to work in a particular layout, and I have a feeling that 3D is only going to get bigger on the web in the future.

I have yet to start a daily 3D project, as I think you either need more free time than I have, or a bit more practice than I have had so that your workflow is faster. A better computer would probably help too. But the idea of making something creative every single day has stuck with me. It is just so cool to think that at the end of a year, you’d have 365 visuals to show for it. I am even considering starting a daily project in photoshop or illustrator, as I have more experience in those and am more likely to be able to keep it up.

If you are a designer in any field, I implore you to try out a 3D application. Not only is it really fun to create 3D renders, you are also bound to learn something that applies to your own field of design. Personally I consider 3D a part of my toolkit going forward, and I am definitely going to continue using Cinema 4D. And on that note, I’ll end this post with my last two renders from my month with Cinema 4D.